Setting up a Droplet is very easy. These are (my) routine steps for setting up a new droplet at Digital Ocean:
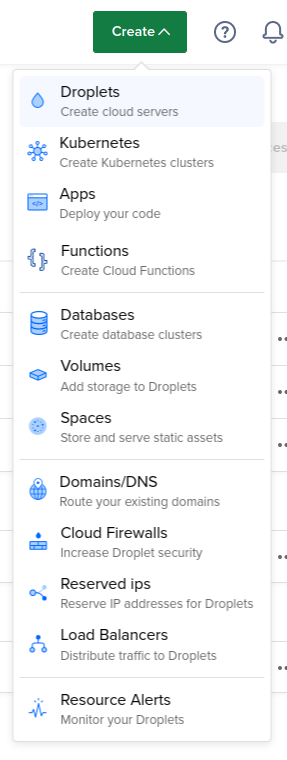
1. Click the green “Create” button in the upper right corner, and select “Droplets”.
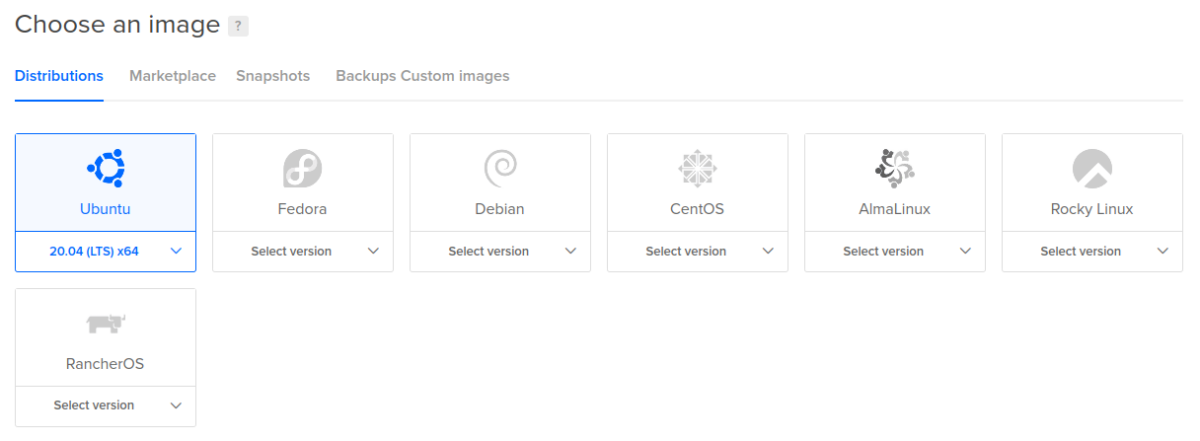
2. Select your operating system image.
I normally use Ubuntu’s latest LTS server.
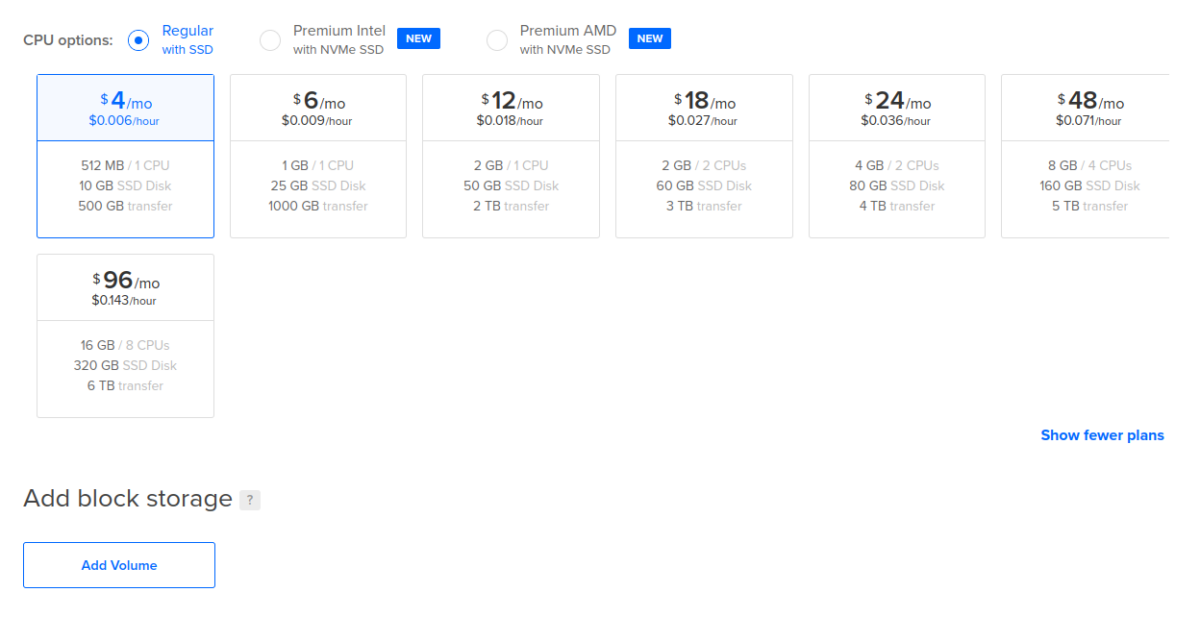
3. Select the type of plan you want.
The cheapest option, a shared cpu is enough for a low-traffic web server.

4. Select from your CPU options.
You can always increase the amount of CPUs (actually, cores) at a later time if you decide you need it, but you can’t switch between regular, AMD or Intel without creating a new droplet. You can also add block storage (Volumes) here if you need it. Object storage (Spaces) is cheaper. Each type of storage has it’s pros and cons and is beyond the scope of this article. I won’t need to add any extra storage for this simple web server Droplet:
5. Choose the data center where you want your server to be located.

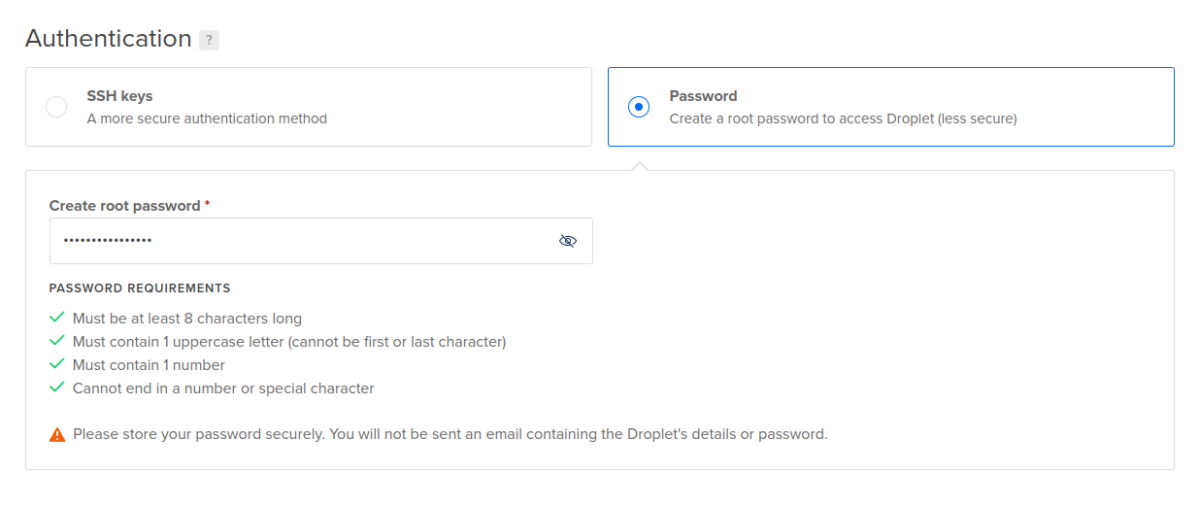
6. Choose the type of authentication you want for logging into the server.
Whichever one you select will affect how SSH is initially set up on the droplet. If you select “SSH keys”, you will not be able to use SSH with a password unless you change the setting. It is more secure to use SSH keys and not use passwords.

If using the SSH keys method:
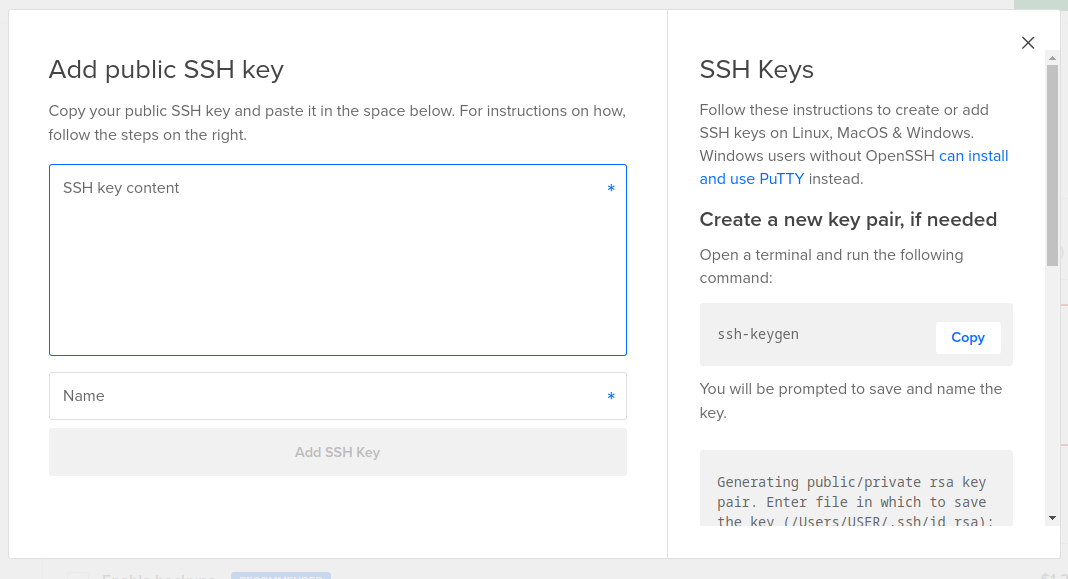
If you have previously uploaded any keys, they will be listed here and you can check the ones you want to include in this Droplet. If not, and you have already created keys on your computer, you can paste the content of each key into the content box and give it a name. The name you give it is only for reference within your Digital Ocean account, it has nothing to do with how it’s referenced withing the Droplet. To view the content of a user’s key in order to copy it, enter:
cat /home/USER/.ssh/id_rsa.pub
or open it in any text editor. Make sure you are copying the public key (/home/USER/.ssh/id_rsa.pub) and not the private key (/home/USER/.ssh/id_rsa). At a minimum, you will need a key pair for the root user to initially log in, update the system, and create any user accounts that will be needed. Once another user is created with sudo privileges, the authorized_keys file can be copied into the new user’s account to allow this new user to SSH into the Droplet. This process is explained below.
If you don’t already have keys, you can follow the instructions on the right to create them:
If using the Password method:
Enter the password into the “Create root password” box. It is best to use a password generator to create strong passwords with random characters that are stored in a password safe of some kind. I use KeePassXC.
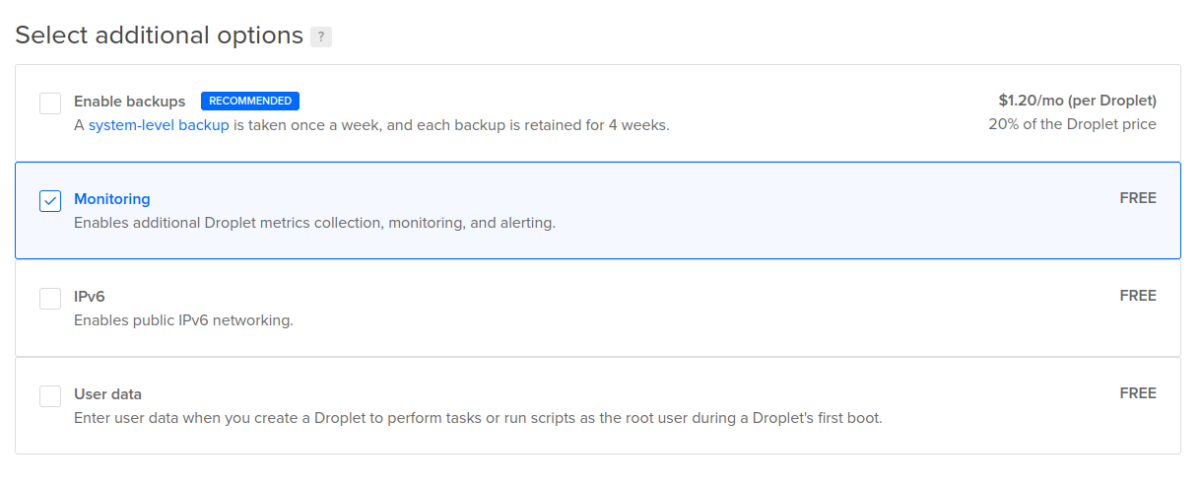
7. After configuring your Authentication method, select any other options you might want or need.
If you don’t have any other type of system of backing up this server, I’d recommend adding the “Enable backups” option. And monitoring is a free option, so I’d choose it also:
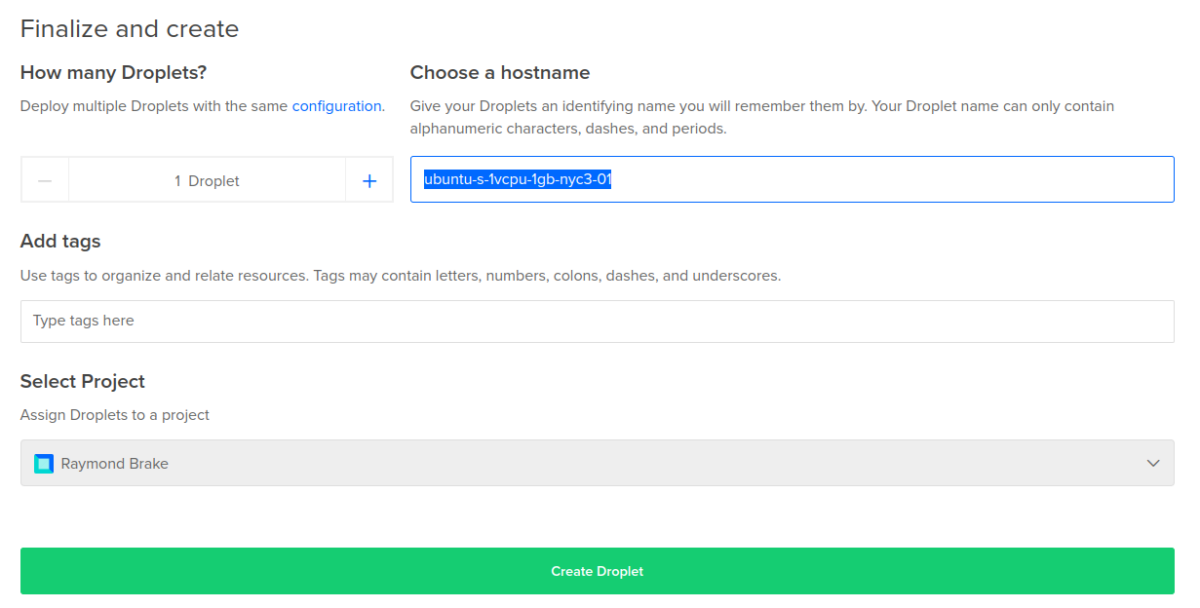
8. Choose a hostname for the new server and click the “Create Droplet” button:
Prepare the new Droplet for use:
If you chose the SSH keys authentication method:
Log in to the new server using the IP address assigned by the VPS host (change IP_ADDRESS to your new IP address):
ssh root@IP_ADDRESS
Now within the new server, update Ubuntu:
# apt update && apt upgrade
Create a new user with sudo capability and set the passwd (change NEW_USER to your user name):
# useradd -m -d /home/NEW_USER -s /bin/bash -G sudo NEW_USER
# passwd NEW_USER
Create the new user’s .ssh directory:
# mkdir /home/NEW_USER/.ssh
Copy the authorized_keys file from root’s .ssh directory to the new user’s .ssh directory:
# cp /root/.ssh/authorized_keys /home/NEW_USER/.ssh/
Give the .ssh/ directory and authorized_keys file the proper permissions and ownership:
# chmod 0700 /home/NEW_USER/.ssh/
# chmod 0600 /home/NEW_USER/.ssh/authorized_keys
# chown -R NEW_USER:NEW_USER /home/NEW_USER/.ssh/
Open another terminal on your computer and confirm that the new user can log in to the new server with the copied SSH key:
ssh NEW_USER@IP_ADDRESS
With the new user created and logged in, go to the previous terminal window and log out of the root account:
# exit
Now we can make a few changes to make SSH a little more secure. Open the /etc/ssh/sshd_config file in vim or nano using sudo (will require your password) and make the changes:
sudo vim /etc/ssh/sshd_config
OR
sudo nano /etc/ssh/sshd_config
Add the line “Protocol 2” after the initial comments:
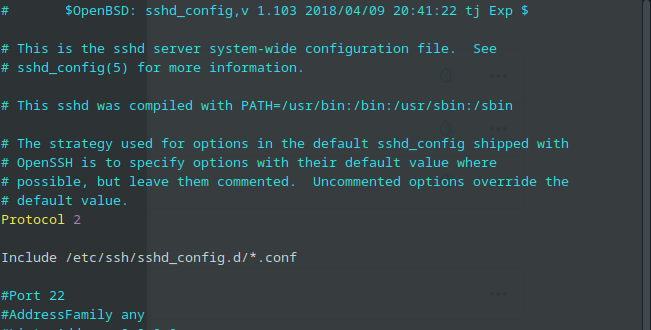
Change the default port from 22 to whatever port you want to use by removing the “#” to uncomment it. Take note that if you change this, you will have to log in using the -p switch. In the following example, I’ve changed the default SSH port to “3333“:
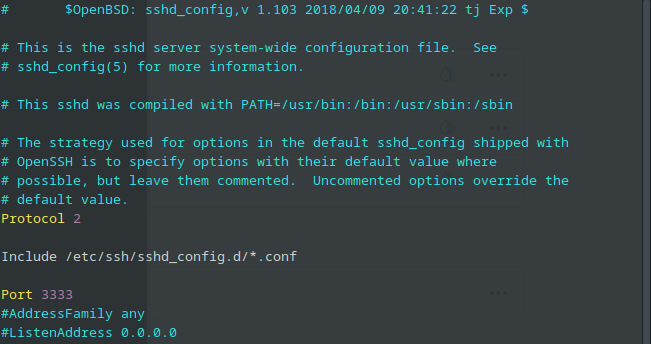
So after changing this, I would have to log in using:
ssh -p 3333 NEW_USER@IP_ADDRESS
Change PermitRootLogin to no. Also, to limit the users that can access the server, add the line “AllowUsers” followed by all the users that are allowed to access this server, with each name separated by a space. You can also use DenyUsers in the same way to disallow users. If both options are included in the file, DenyUsers takes precedence over AllowUsers.

Make sure PasswordAuthentication is set to no. If you chose SSH authentication when creating the Droplet, it should already be set to no:
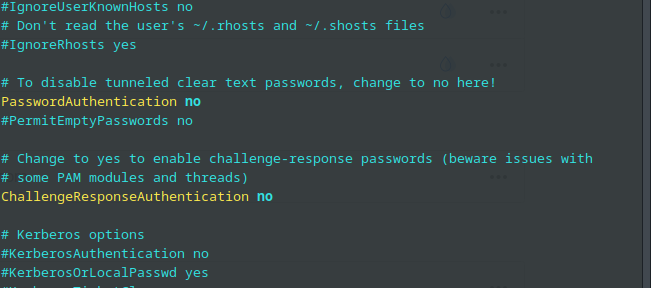
Set ClientAliveInterval to 300, and ClientAliveCountMax to 0:
Change:

To:

Now save the file and exit out of it. These changes should be enough for basic security, but you can never have too much security. The changes made in the file won’t be implemented until the SSH server is restarted with:
sudo systemctl restart ssh
If you chose the Password authentication method:
You can still change over to strictly SSH key authentication by making the changes to the /etc/ssh/sshd_config file as outlined above, but note that you must have the keys in place on your server before you do or you will have no way to login to the server.
This is a basic setup for creating a Digital Ocean Droplet server. For more security, I would add a Cloud Firewall.